Nhanganyaya
This manual provides comprehensive instructions for the AudioRange ITE-1000 Wireless TV Audio Headset Add-on. This headset is designed to enhance TV listening for individuals, particularly seniors and those with hearing impairment, by delivering clear, amplified audio directly to their ears. This product is an add-on headset and requires an existing AudioRange ITE-1000 wireless TV listening system (transmitter and charging dock) for full functionality.
Chii Inosanganisirwa
- AudioRange ITE-1000 Wireless TV Audio Headset
- Extra Rechargeable Battery
- Small Balance Adjustment Screwdriver
- Various Sizes of Ear Tips for personalized comfort
Product Overview
The AudioRange ITE-1000 headset is a lightweight, neckband-style device with in-ear earbuds. It features intuitive controls for a personalized listening experience.

Mufananidzo 1: Kupfuuraview of the ITE-1000 Headset with key features highlighted.
Zvinokosha:
- Lightweight Design: Weighing only 2oz, it is 50% lighter than traditional headphones, ensuring comfort during extended use.
- Voice-Clarifying Tone Control: Adjustable tone dial to enhance speech clarity.
- Right/Left Balance Control: Allows individual volume adjustment for each ear, beneficial for users with varying hearing loss in each ear.
- Yakavakirwa-mukati Maikorofoni: A dedicated button mutes TV audio and amplifies surrounding sounds, enabling conversation without removing the headset.
- Rechargeable Battery: Provides up to 10 hours of listening time.
- Easy Setup: No complex pairing or passwords required; simply plug and play with a compatible AudioRange ITE-1000 system.

Figure 2: Benefits of the ITE-1000 Headset, including comfort and performance.
Setup and Connection Guide
This section details how to set up and connect your AudioRange ITE-1000 headset to your TV system. Remember, this is an add-on headset and requires the AudioRange ITE-1000 transmitter/charging dock (sold separately).
1. Kuchaja Headset
Place the headset onto the charging dock, ensuring the three prongs on the headset align with the receivers on the base. Press down firmly to ensure a secure connection. The charging indicator lights on the base will confirm charging status.
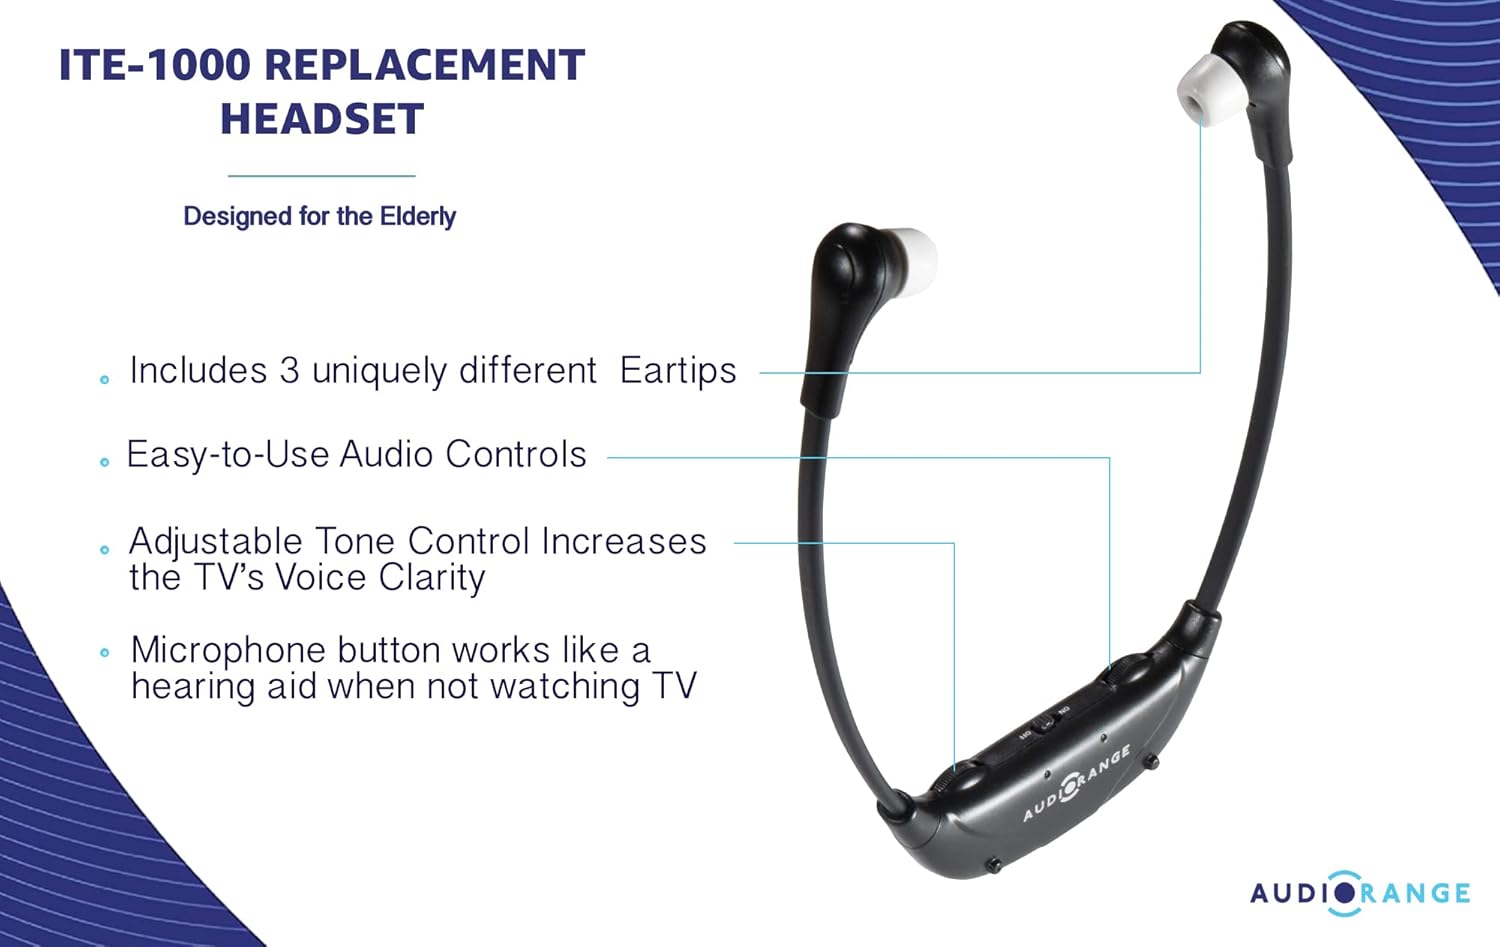
Figure 3: Headset correctly placed on the charging dock.
2. Connecting the Transmitter to Your TV (Transmitter Sold Separately)
The AudioRange ITE-1000 transmitter offers multiple connection options to ensure compatibility with most TVs.
Option A: 3.5mm Audio Out (Headphone Jack)
If your TV has a 3.5mm audio output port (often labeled 'Audio Out' or with a headphone icon), use the provided 3.5mm audio cable.
- Plug one end of the 3.5mm audio cable into the 'Audio Out' port on your TV.
- Plug the other end of the 3.5mm audio cable into the corresponding input port on the back of the AudioRange transmitter.
Option B: RCA Audio Out (Red and White Ports)
If your TV has red and white RCA audio output ports (labeled 'L' and 'R' for Left and Right audio), use the provided RCA audio cable.
- Connect the red and white plugs of the RCA cable to the corresponding red and white 'Audio Out' ports on your TV. Ensure these are 'Audio Out' ports, not 'Audio In'.
- Plug the single 3.5mm end of the RCA adapter cable into the corresponding input port on the back of the AudioRange transmitter.
Option C: Optical Audio Out (Digital Audio)
For newer TVs with an optical audio output port (often labeled 'Optical Audio Out' or 'Digital Audio Out'), use the provided optical audio cable for the best sound quality.
- Remove the protective caps from both ends of the optical audio cable.
- Plug one end of the optical cable into the 'Optical Audio Out' port on your TV.
- Plug the other end of the optical cable into the corresponding input port on the back of the AudioRange transmitter.
Operating Instruction
Once the transmitter is connected to your TV and the headset is charged, you can begin using your AudioRange ITE-1000 headset.
1. Simba On / Off
- To turn on the headset, slide the ON/OFF switch located on the headset to the 'ON' position.
- To turn off the headset, slide the ON/OFF chinja kuenda kunzvimbo yekuti 'OFF'.
2. Kugadzirisa Inzwi
- Shandisa iyo Vhoriyamu Dial on the headset to increase or decrease the overall listening volume.
3. Kugadzirisa Matauriro
- Shandisa iyo Tone Dial on the headset to adjust the audio frequency for clearer voice understanding. Turn the dial to find the setting that best suits your hearing preference.
4. Using Balance Control
The balance control allows you to adjust the volume independently for the left and right earbuds. This is particularly useful if you have different levels of hearing in each ear.
- Locate the small BAL (Balance) adjustment screw on the headset.
- Using the provided small screwdriver, carefully turn the screw to adjust the balance between the left and right earbud volumes until it is comfortable for you.
5. Using the Microphone Button
The built-in microphone allows you to hear ambient sounds around you without removing the headset.
- Press the MIC button on the headset to activate the microphone. This will temporarily mute the TV audio and amplify surrounding conversations or sounds.
- Press the MIC button again to return to TV audio.

Mufananidzo 4: Detailed view of the headset controls for volume, tone, balance, and microphone.
Maintenance
1. Kuchenesa
- Wipe the headset and charging dock with a soft, dry cloth.
- Periodically clean the ear tips with a mild soap and water solution, then rinse thoroughly and allow to dry completely before reattaching.
2. Replacing Ear Tips
The headset comes with various ear tip sizes to ensure a comfortable and secure fit. To replace:
- Gently pull off the existing ear tip from the earbud.
- Select a new ear tip size that feels most comfortable.
- Push the new ear tip onto the earbud until it is securely attached.

Figure 5: Different ear tip sizes for optimal comfort and fit.
3. Kutsiviwa kwebhatiri
The headset uses a rechargeable Lithium Ion battery. An extra battery is included in the package.
- Carefully open the battery compartment on the headset.
- Remove the old battery and insert the new one, ensuring correct polarity.
- Vhara bhatiri kamuri zvakachengeteka.
Kugadzirisa matambudziko
- Hapana Inzwi:
- Ensure the headset is turned ON and fully charged.
- Verify the transmitter is properly connected to the TV's audio output port and powered on.
- Check TV audio settings to ensure output is directed to the correct port (e.g., external speakers, optical out).
- Adjust the volume dial on the headset.
- Inzwi Rakakanganiswa:
- Adjust the tone control on the headset.
- Ensure the ear tips are clean and properly seated in your ears.
- Tarisa kukanganiswa kubva kune mamwe mawaya zvishandiso.
- Headset Kwete Kuchaja:
- Ensure the charging dock is plugged into a working power outlet.
- Verify the headset is securely placed on the charging dock, making good contact with the charging pins.
Zvinotsanangurwa
- Muenzaniso: ITE-1000 (Headset Add-on)
- Brand: Vadivelu Comedy AudioRange
- Chinhu Weight: 2.6 pounds (package weight, headset is approx. 2oz)
- Mabhatiri: 2 Lithium Ion mabhatiri anodiwa (akabatanidzwa)
- Kurema kwebhatiri: 7.5 magiramu
- Special Features: Lightweight, Microphone, Wireless
- Kunobva Simba: Battery Powered
- Kuenderana: Designed to work with AudioRange ITE-1000 Wireless TV Listening System (transmitter sold separately)
Warranty uye Support
For warranty information, technical support, or further assistance, please refer to the official AudioRange websaiti kana kubata basa ravo revatengi zvakananga. Chengeta risiti yako yekutenga yezvichemo zvewaranti.


