1. Nhanganyaya
Thank you for choosing the JKING Electric Skateboard Model Jupiter-02. This manual provides essential information for the proper setup, operation, and maintenance of your electric longboard. Please read it thoroughly before your first ride to ensure safety and optimal performance.
The JKING Electric Skateboard features a 900W hub-motor, a top speed of 26 MPH, and a range of 19.5-21.8 miles. It is designed for adults aged 16 and above, with a maximum load capacity of 330 lbs.
2. Safety Information
- Always wear protective gear: This includes a helmet, knee pads, elbow pads, and wrist guards.
- Zera uye Weight Restriction: This skateboard is intended for users aged 16 and above. The maximum supported weight is 330 lbs (150 kg).
- Environmental Conditions: The board has an IP64 water resistance rating, meaning it is resistant to splashing water and dust. Avoid riding in heavy rain, through puddles, or in wet conditions to prevent damage to electronic components.
- Pre-Ride Check: Before each use, inspect the skateboard for any loose components, wheel damage, or battery issues. Ensure the remote control is fully charged.
- Understand Your Surroundings: Ride in safe, open areas away from traffic, pedestrians, and obstacles. Be aware of your surroundings and local regulations regarding electric skateboards.
- Braking: Practice braking at various speeds to understand the board's stopping capabilities.
- Kudzora Kumhanya Start with the lowest speed mode and gradually increase as you become comfortable with the board's handling.
- Kuchaja Chengetedzo: Use only the provided charger. Do not overcharge the battery.
3. Zvigadzirwa zveChigadzirwa
The JKING Electric Skateboard Model Jupiter-02 comes with the following main components:
- Electric Skateboard (Deck, Trucks, Wheels, Hub Motors, Battery Enclosure)
- Wireless Remote Control
- Power Adapter and Charging Cable for Skateboard
- Type-C Charging Cable for Remote Control
- T-Tool for adjustments
- Mushandisi Chinyorwa (gwaro iri)
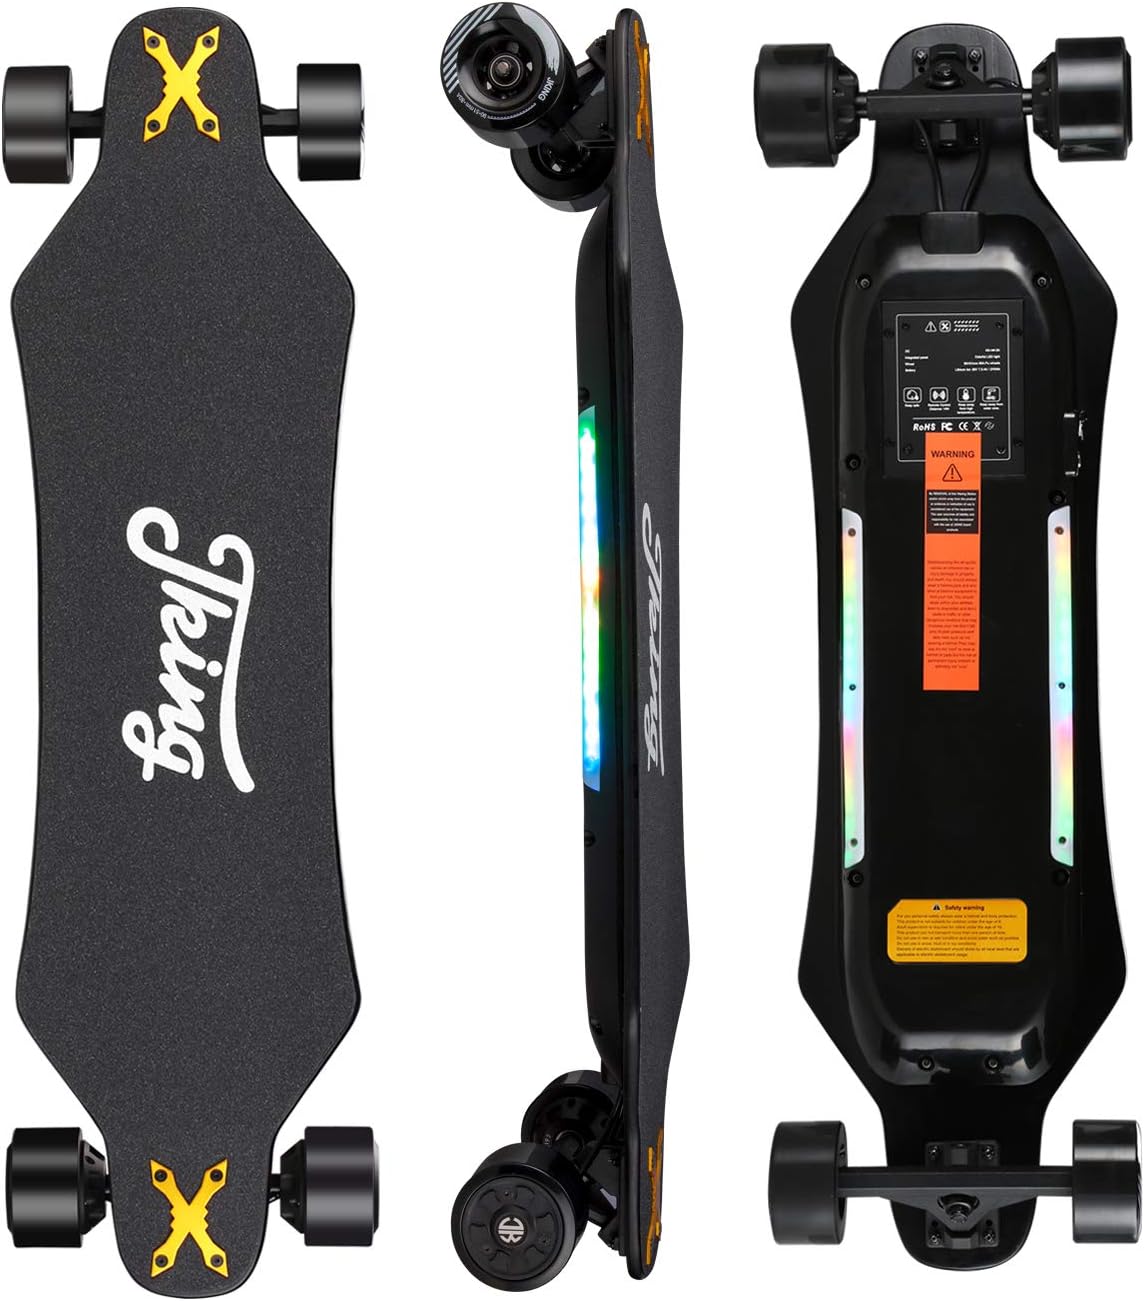
Mufananidzo 3.1: JKING Electric Skateboard showing top, side, and bottom views. The top features a non-slip grip tape with the JKING logo. The side highlights the board's profile and LED light strips. The bottom shows the battery enclosure, hub motors, and warning labels.

Mufananidzo 3.2: Pedyo-up view of the JKING Electric Skateboard's underside, highlighting the ON/OFF button, power jack for charging, and the forward and reverse hub motors.

Mufananidzo 3.3: Diagram of the JKING Electric Skateboard remote control, indicating the LCD Display, Power Buttons, Mode Control Key, Direction Control Key, and Type-C Charging Port. The LCD display shows Speedometer, Remote Control Battery SOC, Speed Gear Level, Odometry, Speed Units, Skateboard Battery SOC, Brake Gear Level, and Trip Mileage.
4. Setup uye Kutanga Kushandisa
4.1 Kuburitsa uye Kuongorora
Carefully remove all components from the packaging. Inspect the skateboard and accessories for any signs of damage. Ensure all listed components are present.

Mufananidzo 4.1: The JKING Electric Skateboard and its included accessories, including the remote control, charger, T-tool, and user manual. The image also shows the board's dimensions: 38.2 inches length, 10.0 inches width, and 5.3 inches height.
4.2 Charging the Skateboard
- Locate the power jack on the underside of the skateboard (refer to Figure 3.2).
- Connect the power adapter to the skateboard's power jack, then plug the adapter into a standard electrical outlet.
- The charging indicator light on the charger will typically change color (e.g., red to green) when charging is complete.
- A full charge takes approximately 4 hours. Do not leave the skateboard charging unattended for extended periods.
4.3 Kuchaja iyo Remote Control
- Locate the Type-C charging port on the remote control (refer to Figure 3.3).
- Connect the provided Type-C charging cable to the remote and a USB power source.
- The remote's LCD display will indicate charging status.
4.4 Kubatanidza Remote Control
The skateboard and remote control are usually pre-paired. If re-pairing is necessary, consult the specific instructions provided with your remote or contact customer support.
5. Operating Instructions
5.1 Kubatidza/Kudzima
- Skateboard: The board will automatically turn on when you start to ride it. It will automatically turn off if not in use for 5 minutes to conserve battery. You can also manually turn it on/off using the power button on the underside (refer to Figure 3.2).
- Remote Control: Press and hold one of the Power Buttons on the remote control to turn it on or off (refer to Figure 3.3).
5.2 Remote Control Mabasa
The remote control allows you to manage the skateboard's speed, direction, and braking.
- Acceleration/Braking: Use the main control lever/wheel to accelerate (push forward) or brake (pull back).
- Speed Modes: The remote features 3 speed modes. Use the Mode Control Key to cycle through these modes (e.g., Low, Medium, High). Start with the lowest speed mode.
- Direction Control: Use the Direction Control Key to switch between forward and reverse motion.
- Chiratidziro cheLCD: The display provides real-time information including current speed, battery levels for both the remote and skateboard, selected speed gear, brake gear, odometry, and trip mileage.
5.3 Mwenje Dziviriro ye LED
The JKING Electric Skateboard is equipped with two seven-color running LED safety light bars on both sides. These lights change direction and speed with the skateboard's movement, enhancing visibility.
- Kubatidza/Kudzima: Press and hold the reverse key (Direction Control Key) on the remote control for approximately 3 seconds to turn the LED light bars on or off.

Mufananidzo 5.1: The JKING Electric Skateboard with its LED light bars illuminated, demonstrating enhanced visibility in low-light conditions. The image also shows a person riding the skateboard.
6. Kuchengeta
- Kuchenesa: Regularly wipe down the board with a damp cloth. Avoid using excessive water or harsh chemicals. For the grip tape, use a soft brush to remove dust and debris.
- Kuchengeta: Store the skateboard in a cool, dry place away from direct sunlight and extreme temperatures. If storing for an extended period, ensure the battery is charged to about 50-60%.
- Wheel and Motor Maintenance: The brushless hub-motors are designed for durability. If the motor wheels wear out, only the sleeve needs replacement, not the entire motor. Regularly check wheels for wear and tear.
- Battery Care: Avoid fully discharging the battery frequently. Charge the battery after each use, or at least once a month if not in use, to prolong its lifespan.
- Hardware Check: Periodically check all nuts and bolts, especially on the trucks and wheels, to ensure they are securely tightened. Use the provided T-tool for adjustments.
7. Kugadzirisa matambudziko
| Dambudziko | Zvinogona Kukonzera | Solution |
|---|---|---|
| Skateboard does not turn on. | Low battery; Skateboard not activated by movement; Power button not pressed. | Charge the skateboard battery; Gently push the board to activate auto-on; Press the power button on the underside. |
| Remote control does not connect. | Low remote battery; Out of range; Pairing issue. | Charge the remote control; Ensure remote is within operating range; Re-pair the remote if necessary (refer to remote's specific instructions). |
| Kuderedza kukurumidza kana kureba. | Low battery charge; Riding uphill or against strong wind; Heavy load; Extreme temperatures. | Ensure battery is fully charged; Adjust riding conditions; Check load weight. |
| Mwenje ye LED haisi kushanda. | Lights turned off; Remote control issue. | Press and hold the reverse key on the remote for 3 seconds to toggle lights; Ensure remote is charged and connected. |
| Mitsindo isina kujairika panguva yekushanda. | Loose components; Debris in wheels/motors. | Inspect all hardware for tightness; Clean wheels and motor areas. If noise persists, contact support. |
8. Zvinotsanangurwa
| Feature | Detail |
|---|---|
| Brand | JKING |
| Model Number | Jupiter-02 |
| Motor Type | Dual Brushless Hub-Motor (450W*2) |
| Top Speed | Kusvika 26 MPH (42 km/awa) |
| Range | 19.5 - 21.8 Miles (31.4 - 35 km) |
| Bhatiri | 36V 7500mAh 270Wh Lithium-Ion (UL 2272 certified) |
| Kuchaja Nguva | Anenge maawa maviri |
| Max Load | 330 Lbs (150 kg) |
| Deck Zvinhu | 8-ply Maple Wood |
| Deck Dimensions (L x W x H) | 38.2 x 10 x 5.3 inches (97 x 25.4 x 13.5 cm) |
| Wheel Size | 90 mm |
| Wheel Material | Polyurethane (PU) |
| Item Weight | 19.4 Mapaundi (8.8 kg) |
| Water Resistance Rating | IP64 |
| Climbing Angle | Kusakwana 20° |
| Age Range | Adult (16+) |
9. Warranty uye Tsigiro
The JKING Electric Skateboard Model Jupiter-02 comes with a 6-month warranty from the date of purchase. This warranty covers manufacturing defects under normal use. It does not cover damage caused by misuse, accidents, unauthorized modifications, or normal wear and tear.
For warranty claims, technical support, or any questions regarding your product, please contact the seller or JKING customer service through the platform where you purchased the product. Please have your purchase receipt and product model number (Jupiter-02) ready.


