1. Nhanganyaya
This manual provides detailed instructions for the operation and maintenance of your Landtek Decibel Meter Sound Level Meter with Data Logging, Model B0CHYSJBK2. This device is designed for accurate measurement and recording of sound levels in various environments.
Zvinokosha:
- 13-inch Large LCD Display for clear readings.
- Integrated Data Logging function with PC connectivity.
- 16.4 ft (5m) corded sound sensor for flexible placement.
- Audible and Visual Alarm with adjustable thresholds and external output.
- Multiple mounting options: desktop, wall mount, hanging, tripod attachment.
2. Package Zviri mukati
Tarisa uone kuti zvinhu zvese zviripo mupakeji:
- Landtek Decibel Meter Main Unit
- Corded Sound Sensor (16.4 ft / 5m cable)
- USB Cable
- Adapter yemagetsi (DC 5V/1A)
- Mounting Hardware (screws, wall anchors, hanging hooks)
- Bhuku reMirayiridzo

Image: Contents of the Landtek Decibel Meter package, including the main unit, sensor, cables, mounting hardware, and manual.
3. Chigadzirwa Pamusoroview
The Landtek Decibel Meter features a large display and a remote sensor for versatile noise monitoring.

Mufananidzo: Mberi view of the Landtek Decibel Meter, displaying a sound level reading and showing the connected remote sound sensor.
Zvikamu:
- Yakakura LCD Ratidza: 13-inch screen for clear visibility of decibel readings.
- Sensor yekurira: A 6mm condenser microphone sensor attached via a 16.4 ft (5m) cable for flexible placement away from the main unit.
- Mabhatani ekudzora: Includes 'SEL' for selection, arrow buttons for adjustment, and a power button.
- Zviratidzo: REC (recording), USB (connection), and Alarm indicators.
- Zviteshi: DC 5V/OUT for power and external alarm, USB for PC connection.

Image: Diagram illustrating the dimensions of the 13-inch display and the approximate 196-inch (16.4 ft) length of the sound probe cable.
4. Setup
4.1 Kubatidza
- Connect the power adapter to the DC 5V/OUT port on the side of the decibel meter.
- Plug the power adapter into a standard electrical outlet. The device will power on automatically.
4.2 PC Software Installation and Synchronization
To utilize the data logging features and configure advanced settings, the device must be connected to a PC with the dedicated software. The software is compatible with Windows 7, 8, 10, and 11 (64-bit versions).

Image: Step-by-step instructions for downloading software via QR code, connecting the device to a PC, and synchronizing for data logging.
- Dhaunirodha Software: Scan the QR code provided in the physical manual or visit https://cd50.net/389/ kurodha PC software.
- Batanidza mudziyo: Use the provided USB cable to connect the decibel meter to your PC.
- Tanga Software: Open the downloaded software on your PC. The software should display "Connected" once the device is recognized.
- Batanidza: Press the "SYNC" button within the software to synchronize the device. Wait for the save confirmation.
Important Note: The device requires a continuous power supply to retain settings. If power is disconnected, settings may revert to default, requiring re-synchronization with the PC software.
5. Operating Instructions
5.1 Yekutanga kuyerwa
Once powered on, the device will immediately begin measuring ambient sound levels and display the decibel (dB) value on the large LCD screen.
5.2 Kunzwisisa Chiratidziro
The display shows the current decibel reading. An analog bar level indicator on the right side provides a quick visual reference of the noise level range.

Image: Close-up of the decibel meter display, accompanied by a chart explaining the color-coded analog bar level indicator and corresponding dB ranges.
5.3 Kutemerwa data
The device can record sound level data at 2-second intervals for up to one year. This data can be retrieved and analyzed using the PC software.
- Tanga/Misa Kurekodha: Press the '▼' (down arrow) button for 2 seconds to start or stop recording. The 'REC' indicator light will flash when active.
- Kudzosa Data: Connect the device to your PC and use the software to view, export, and analyze recorded data.
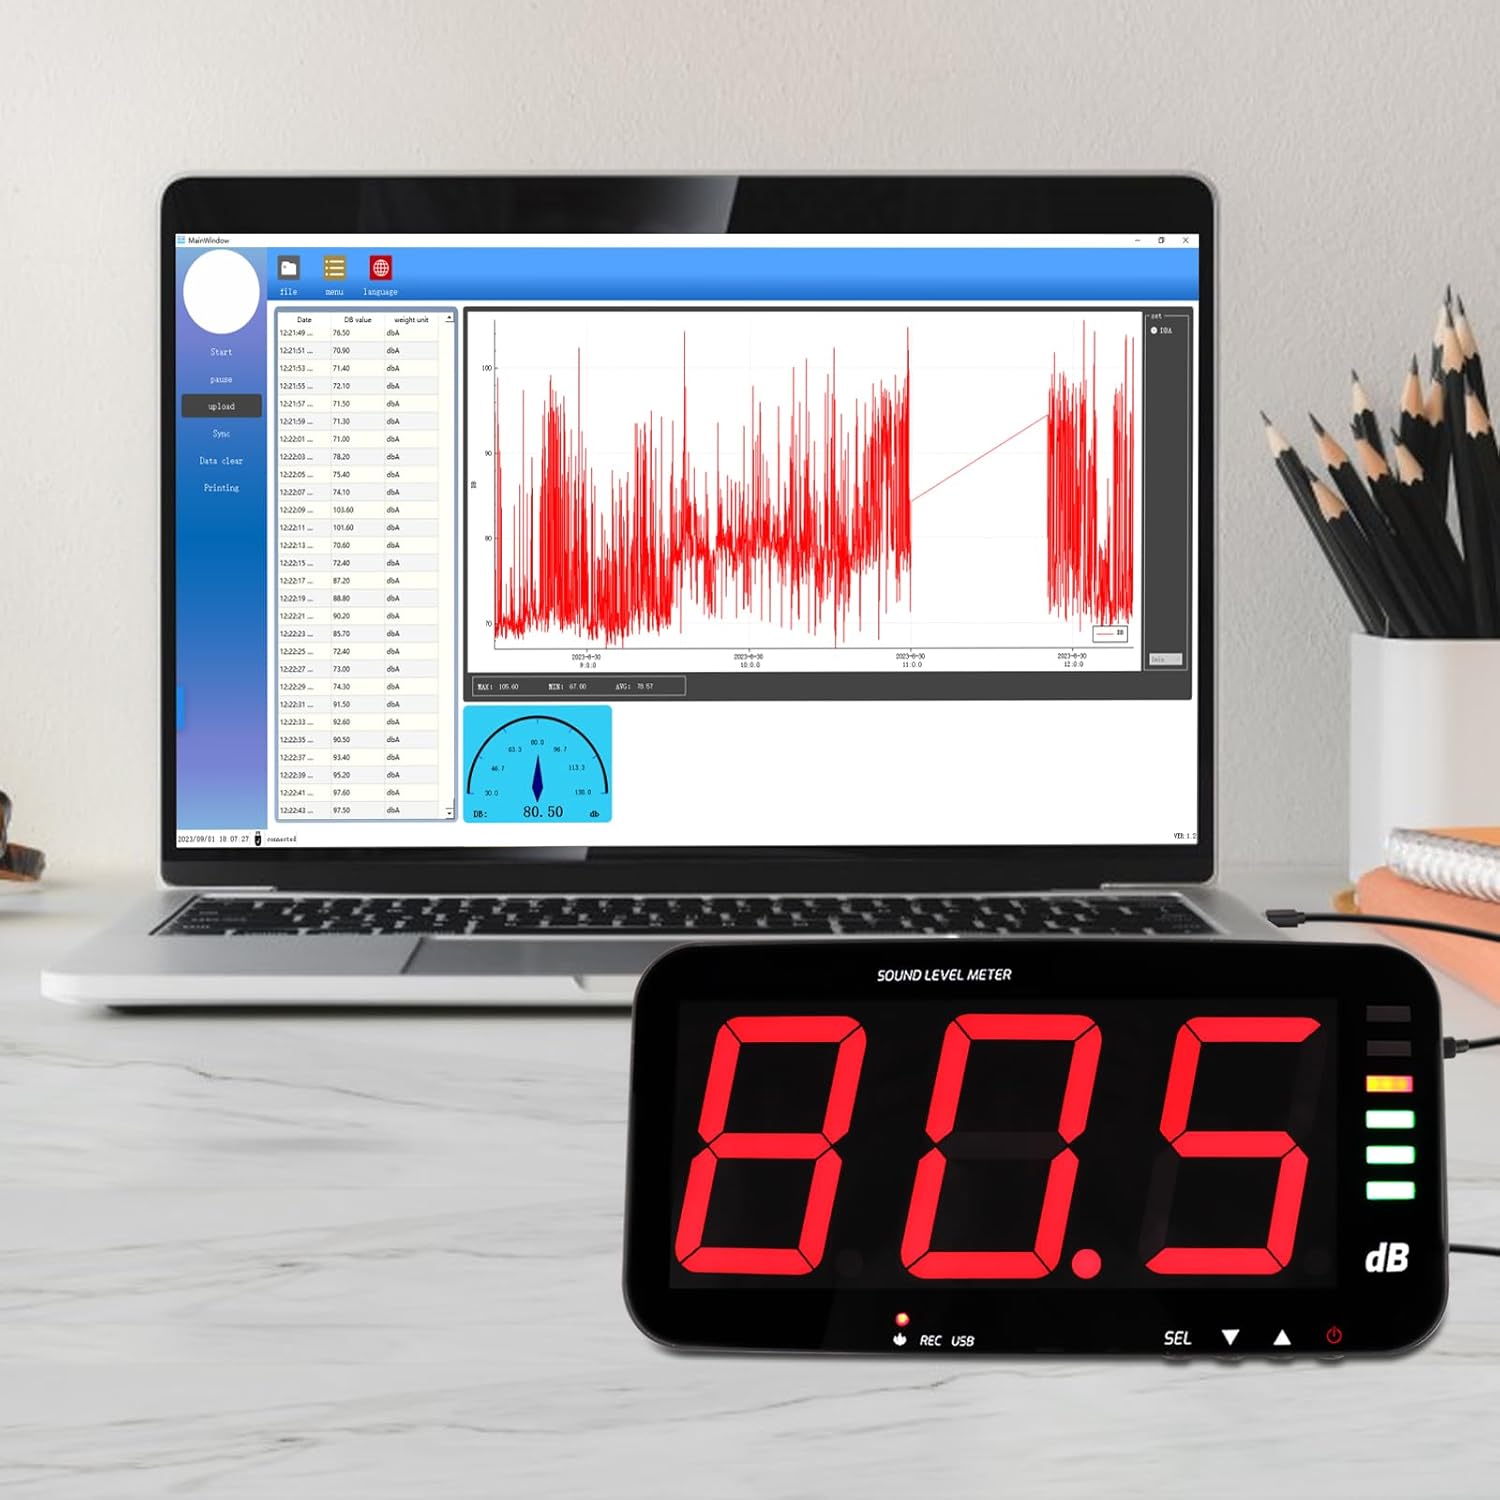
Image: The decibel meter connected to a laptop, displaying the data logging software interface with a graph of recorded sound levels.
5.4 Alarm Mabasa
The meter features audible and visual alarms when a predefined decibel threshold is exceeded. The default alarm threshold is 120dB.
- Setting Thresholds: Long press the 'SEL' button to enter alarm settings. Use the arrow buttons to adjust the decibel threshold and alarm duration.
- Alarm yekuona: The alarm indicator light will illuminate or flash when the threshold is met.
- Inonzwika Alarm: An internal buzzer will sound.
- External Alarm Output: The device includes a 3.5mm jack port for connecting an external 12V alarm speaker (not included).

Image: The decibel meter displaying a sound level with the alarm indicator light active, signifying an audio and visual alarm condition.

Mufananidzo: Side view of the decibel meter showing the DC 5V/OUT port connected to an external red alarm speaker, demonstrating the external alarm output interface.
6. Mounting Options
The Landtek Decibel Meter offers several flexible mounting solutions to suit various environments.
- Kuiswa kweDesktop: Use the integrated stand for discreet tabletop placement.
- Wall Mount: Utilize the provided mounting hardware to secure the unit to a wall.
- Kurembera: The device can be hung using hooks or chains (not included) from a ceiling or overhead structure.
- Tripod Attachment: A standard tripod screw hole allows for attachment to a camera tripod (tripod not included).

Image: A collage demonstrating four different ways to mount the decibel meter: wall mount, hanging, tabletop placement, and attachment to a tripod.
7. Zvinotsanangurwa
| Feature | Tsanangudzo |
|---|---|
| Measurement Range | 30 ~ 130 dB |
| Kururama | ±1.5 dB (at 94dB@1KHz) |
| Resolution | 0.1 dB (<100dB); 1 dB (>100dB) |
| Frequency Weighting | Kurema |
| Frequency Response | 31.5Hz ~ 8.5KHz |
| Sampling Rate | 2 nguva / sekondi |
| Nguva Kurema | FAST, 0.5 seconds |
| Sensor | 6mm condenser microphone sensor |
| Test Probe Cable Length | Mamita 5 (anenge 16.4 ft) |
| Display | LED digital tube, single character 4 inches |
| Alarm Output | 12V high level |
| Alarm Alert | Ruzha neChiedza |
| Magetsi | DC 5V / 1A |
| Dimensions | 323 x 173 x 40 mm (inenge 12.7 x 6.8 x 1.6 inches) |
| Kurema | Approx. 980 grams (2.16 lbs) |
8. Kuchengeta
To ensure the longevity and accuracy of your decibel meter, follow these maintenance guidelines:
- Kuchenesa: Pukuta chiratidziro uye casing nemucheka munyoro, wakaoma. Usashandise abrasive cleaners kana solvents.
- Kuchengeta: Chengetedza mudziyo munzvimbo inotonhorera, yakaoma kure nechiedza chezuva uye tembiricha yakanyanyisa.
- Sensor Care: Keep the microphone sensor clean and free from dust or debris to maintain measurement accuracy.
- Magetsi: Always use the provided power adapter to prevent damage to the device.
9. Kugadzirisa matambudziko
- Device loses settings after power off: This device requires continuous power to retain custom settings. If the power supply is interrupted, settings may revert to default. Reconnect to PC and re-synchronize using the software to restore desired settings.
- Kuratidza hakuna chinhu: Ita shuwa kuti adapta yemagetsi yakabatana zvakachengeteka kune ese mudziyo uye inoshanda magetsi.
- No data logging on PC: Verify that the USB cable is properly connected and the PC software is running. Ensure the device is synchronized with the software (refer to Section 4.2). Check that recording is active on the device (REC indicator flashing).
- Alarm not triggering: Check the alarm threshold settings via the PC software or by long-pressing the 'SEL' button. Ensure the threshold is set appropriately for the noise levels being monitored.
- Slow update intervals: The device updates approximately once per second. This is normal operation. For very short, transient sounds, the meter may not register the peak value instantly.


