1. Nhanganyaya
This manual provides detailed instructions for the proper installation, operation, and maintenance of your Tilta Vintage Camera Cage Base Kit, designed specifically for the Leica Q3 camera. This kit enhances camera handling, protection, and accessory mounting capabilities.

Image 1.1: The Tilta Vintage Camera Cage Base Kit mounted on a Leica Q3 camera, showcasing its integrated design and lens cap.
2. Chii chiri muBhokisi
Ndokumbira utarise kuti zvese zvakanyorwa pazasi zviripo mupakeji yako:
- Mounting Baseplate with Leather Grip for Leica Q3 - Black (12001.00268.00.00) x1
- Hot Shoe Thumb Bracket for Leica Q3 - Black (12001.00265.00.00) x1
- Lens Cap for Leica Q3 - Black (12001.00269.00.00) x1
- T10 Allen Key (32123.00078.00.00) x1
- T6 Allen Key (32123.00073.00.00) x1

Image 2.1: Visual representation of the Tilta Vintage Camera Cage Base Kit components.
3. Zvikamu zveChigadzirwa Zvapfuuraview
3.1. Mounting Baseplate with Leather Grip
The baseplate provides a secure foundation for your camera, offering protection and a comfortable leather grip for improved ergonomics. It features an integrated ARCA-compatible design for quick mounting to tripods and gimbals.

Image 3.1: Detail of the premium European tanned leather grip, designed for comfort and aesthetic integration.
3.2. Hot Shoe Thumb Bracket
This bracket mounts to the camera's hot shoe, providing an additional point of contact for enhanced stability and a more secure grip during handheld shooting. Its design ensures optimal tactile response.

Image 3.2: The hot shoe thumb grip, designed to improve camera stability and handling.
3.3. Lens Cap
The included lens cap is constructed from aerospace-grade aluminum, offering robust protection for your camera lens. Its precision-carved design ensures a secure fit.

Image 3.3: The durable lens cap, providing protection for the camera lens.
4. Setup Instructions
4.1. Attaching the Mounting Baseplate
- Ensure your Leica Q3 camera is powered off.
- Align the mounting baseplate with the bottom of your camera.
- Use the provided T10 Allen key to securely fasten the specialized screws that attach the baseplate to the camera. Ensure a snug fit without overtightening.
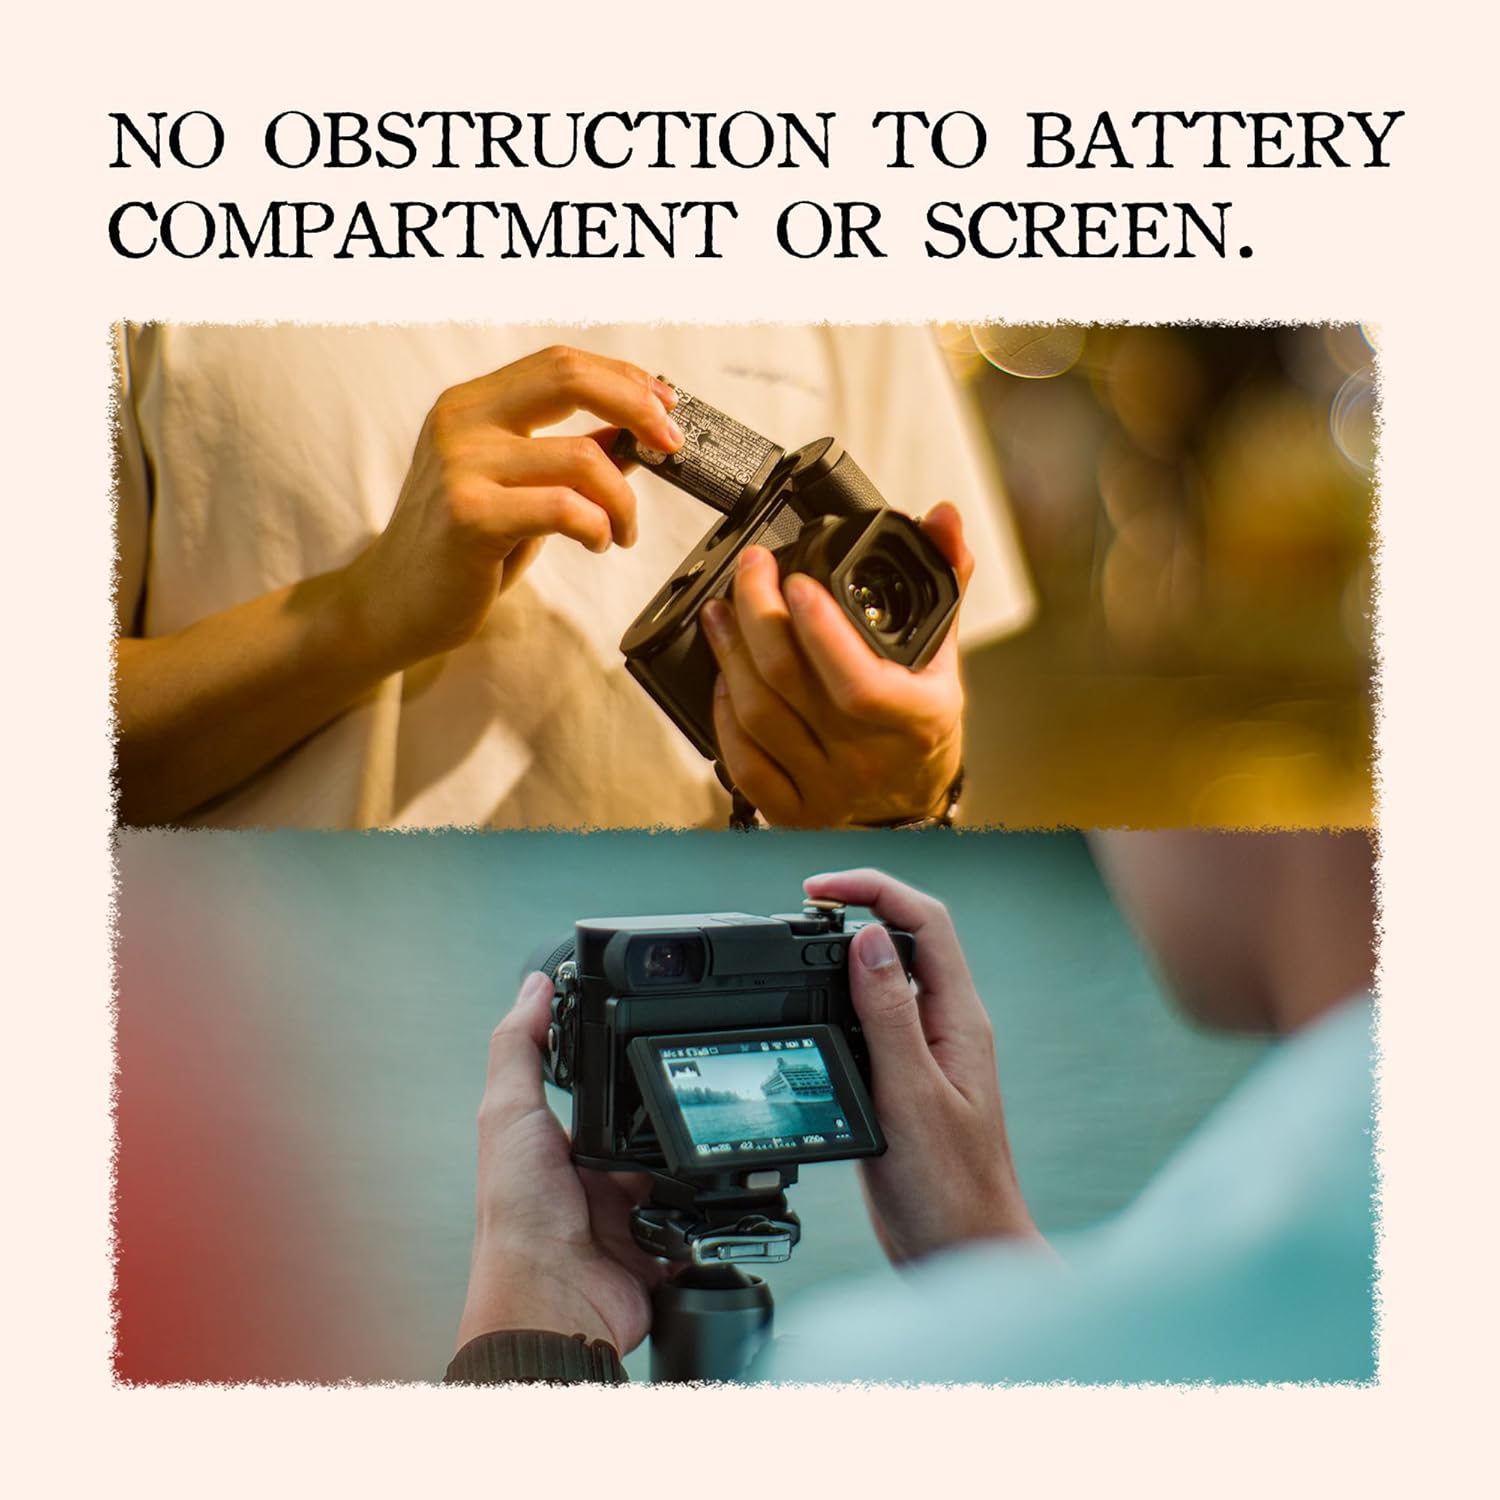
Image 4.1: Illustrates the process of attaching the baseplate to the camera body.
4.2. Installing the Hot Shoe Thumb Bracket
- Slide the hot shoe thumb bracket into the camera's hot shoe slot.
- Gently push until it is fully seated. The bracket is designed to fit securely.
4.3. Attaching the Lens Cap
- Align the lens cap with the front of your camera lens.
- Press firmly until the cap clicks into place, ensuring it is securely attached.
5. Operating Instructions
5.1. Camera Access
The Tilta Vintage Camera Cage Base Kit is designed to provide full and unobstructed access to all camera controls, the battery compartment, and the tilt screen. You can change batteries and access memory cards without removing the cage.

Image 5.1: Demonstrates clear access to the battery compartment and the camera's tilt screen while the cage is installed.
5.2. Tripod Mounting
The baseplate features an ARCA-compatible design, allowing for quick and secure attachment to ARCA-Swiss standard tripods and gimbals. Simply slide the camera with the cage onto your ARCA-compatible quick release plate.

Image 5.2: The camera cage's baseplate is compatible with ARCA-Swiss quick release systems for tripod mounting.
5.3. Detachable Top Cover
The top cover of the cage is detachable, preserving access to all controls while combining thumb grip functionality with essential protection. This smart design also accommodates various hot shoe accessories, such as flash units.

Image 5.3: The detachable top cover allows for flexible accessory mounting and maintains access to camera controls.
6. Kuchengeta
6.1. Kuchenesa
- Cage Body: Wipe with a soft, dry cloth to remove dust and fingerprints. For stubborn marks, a slightly damp jira rinogona kushandiswa, rinoteverwa nekuomeswa nekukasira.
- Leather Grip: Use a specialized leather cleaner or a very lightly damp jira. Dzivisa makemikari ane hasha.
- Lens Cap: Clean with a soft, lint-free cloth.
6.2. Kuchengeta
Store the camera cage kit in a cool, dry place away from direct sunlight and extreme temperatures. When not in use, ensure all components are clean and free of debris.
7. Kugadzirisa matambudziko
7.1. Loose Components
If any part of the cage feels loose after installation, re-check the fastening screws using the appropriate Allen key. Ensure they are tightened securely but do not overtighten to avoid damaging the camera or cage.
7.2. Difficulty Attaching
If you encounter difficulty attaching the baseplate or thumb bracket, ensure proper alignment with the camera's mounting points and hot shoe. Do not force components into place. Refer to the setup instructions (Section 4) for correct installation steps.
8. Zvinotsanangurwa
| Feature | Tsanangudzo |
|---|---|
| Product Dimensions | 5.31 x 4.41 x 3.35 inches (13.49 x 11.20 x 8.51 cm) |
| Item Weight | 4.2 ounces (120 magiramu) |
| Model Number | TA-T76-A-B |
| Inowirirana Devices | Leica Q3 Camera |
| Material | Aluminum Alloy, European Tanned Leather |
| Color | Nhema |
| Standard yekuisa | ARCA-Swiss Compatible |
9. Warranty uye Tsigiro
This product is manufactured by Tilta. For warranty information, technical support, or service inquiries, please visit the official Tilta website or contact their customer service directly. You can find more information at the Chitoro cheTilta paAmazon.


