1. Nhanganyaya
This manual provides detailed instructions for the installation, configuration, and operation of your ASRock X870 Taichi Creator Motherboard. This high-performance ATX motherboard is designed to support AMD Ryzen 9000, 8000, and 7000 Series Processors with an AM5 socket, offering advanced features for creators and enthusiasts.
2. Safety Information
Please read the following safety guidelines carefully before installing or operating your motherboard to prevent damage to the product or injury to yourself.
- Always disconnect the power cord from the wall outlet before touching any components.
- Wear an anti-static wrist strap to prevent electrostatic discharge (ESD) when handling components.
- Ita shuwa kufefetedza kwakaringana mukati mePC kesi yako kudzivirira kupisa.
- Chengetedza mamaboard kure nekunyorova uye kupisa kwakanyanya.
- Refer to the CPU and other component manuals for specific installation instructions.
3. Package Zviri mukati
Tarisa kuti zvinhu zvese zvakanyorwa pazasi zviripo mune yako mamaboard package. Kana chimwe chinhu chisipo kana kukuvara, taura nemutengesi wako.
- ASRock X870 Taichi Musiki Motherboard
- Quick Installation Guide
- Regulatory Cherechedzo
- SATA Data Cables
- Wi-Fi kanyanga
- M.2 Screws uye Standoffs
- ASRock Graphics Card Holder
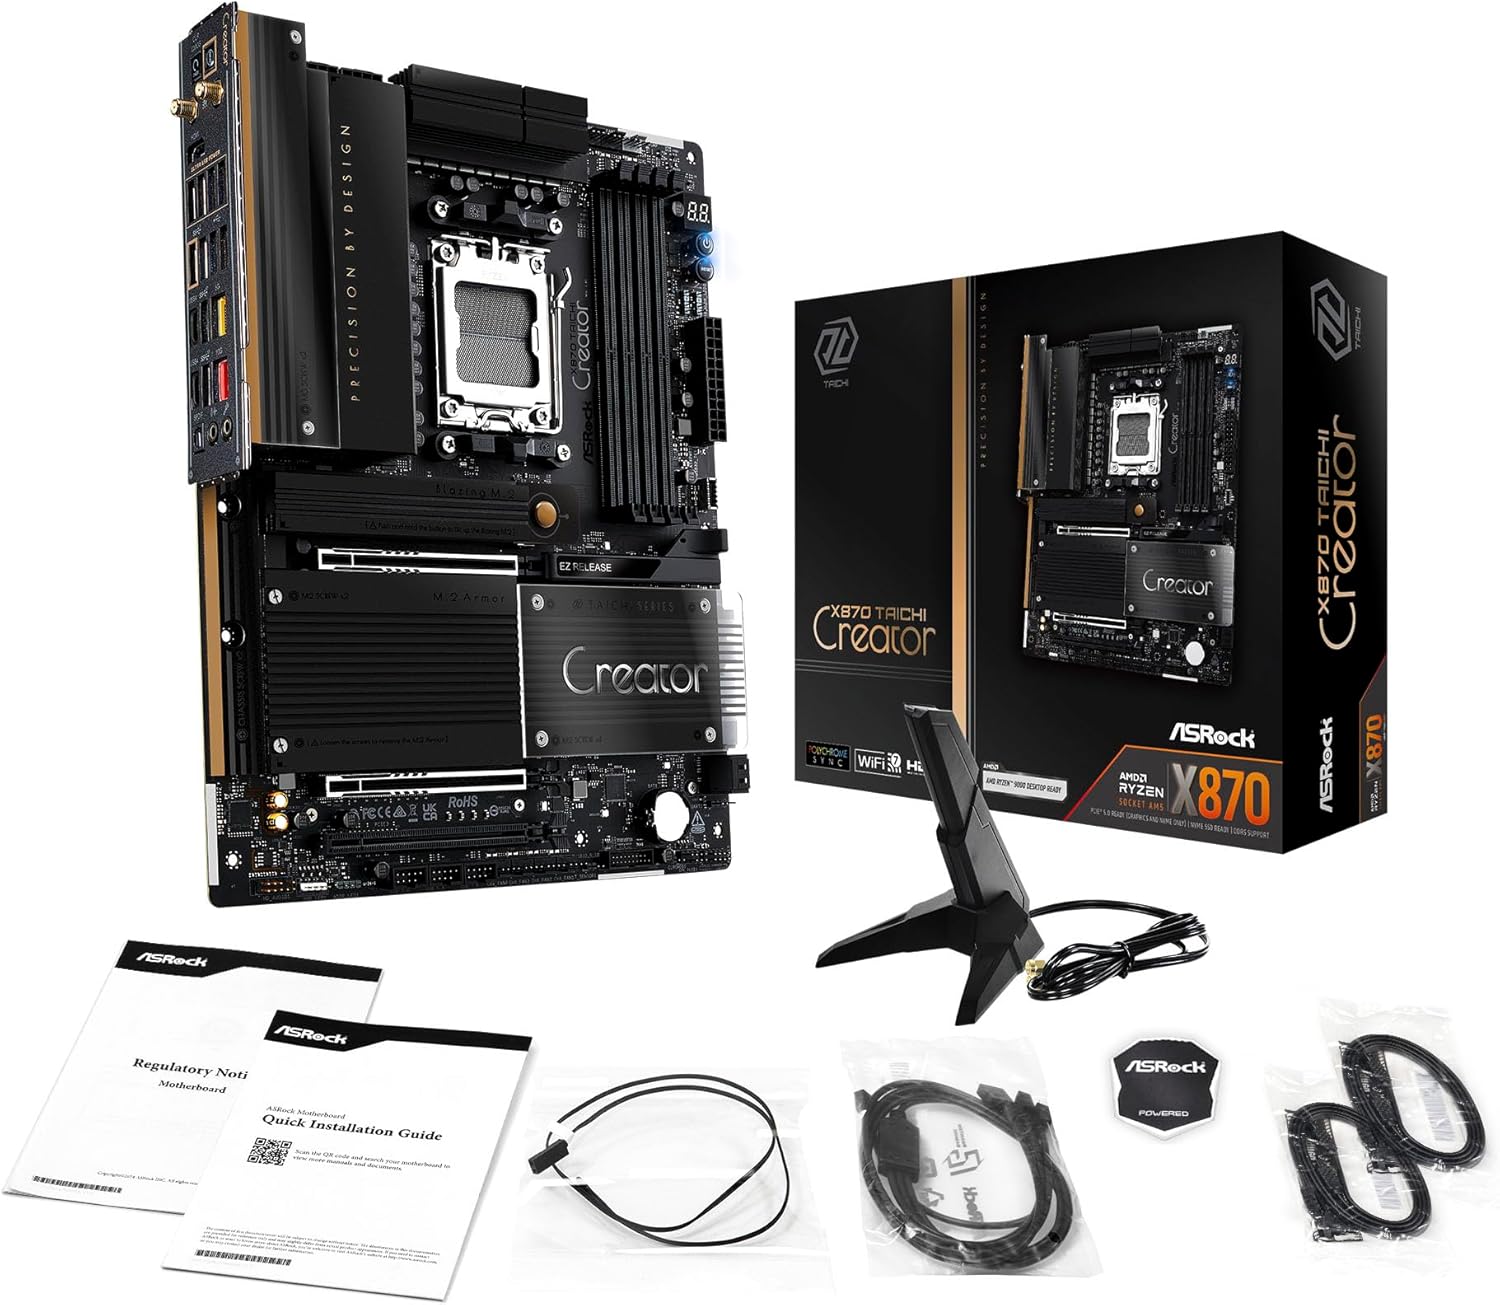
Image: The ASRock X870 Taichi Creator Motherboard shown alongside its retail packaging and various accessories, including cables, documentation, and a graphics card holder.
4. Setup uye Kuiswa
Tevedza aya matanho ekumisikidza kwakaringana kwebhodhi rako reamai uye zvikamu zvaro.
4.1. CPU Installation (Socket AM5)
- Tsvaga iyo AM5 CPU socket pane mamaboard.
- Gently lift the CPU retention lever.
- Align the triangular mark on your AMD Ryzen processor with the corresponding mark on the socket.
- Carefully place the CPU into the socket without applying force.
- Lower the retention lever until it clicks into place, securing the CPU.

Mufananidzo: kumusoro-pasi view of the ASRock X870 Taichi Creator Motherboard, highlighting the central AM5 CPU socket and surrounding components like VRMs and RAM slots.
4.2. Memory (RAM) Kuiswa
The motherboard supports 4 x DDR5 DIMM slots for dual-channel memory technology.
- Vhura zvimedu kumagumo ese eDIMM slot.
- Gadzirisa notch paDDR5 memory module nekiyi muDIMM slot.
- Isa iyo memory module zvakasimba mukati meiyo slot kusvika ma clips apinda munzvimbo.
- For dual-channel configuration, refer to your motherboard manual for recommended slot pairing.
4.3. Storage Device Installation
The motherboard features M.2 slots and SATA3 ports for storage.
4.3.1. M.2 SSD Kuiswa
The board includes 1 Ultra M.2 (PCIe Gen3x4), 1 Hyper M.2 (PCIe Gen4x4), and 2 Blazing M.2 (PCIe Gen5x4) slots.
- Locate the desired M.2 slot and remove the M.2 heatsink if present.
- Isa iyo M.2 SSD mukati meiyo slot pane 30-degree angle.
- Gently push down the SSD and secure it with the provided M.2 screw or standoff.
- Batanidza zvakare M.2 heatsink kuti ishande zvakanaka pakupisa.
4.3.2. SATA Device Installation
Connect SATA storage devices (HDDs/SSDs) to the 4 SATA3 ports using SATA data cables.
4.4. Kuisa Kadhi rePCI
The motherboard provides 2 PCIe 5.0 x16 (x8/x8) slots and 1 PCIe 3.0 x16 slot.
- Select an available PCIe slot.
- Bvisa inowirirana yekuwedzera slot kavha kubva paPC kesi yako.
- Align your PCIe card with the slot and press down firmly until it is seated correctly.
- Secure the card with a screw to the PC case.
4.5. Simba Connections
Connect the 24-pin ATX power connector and the 8-pin (or 4+4-pin) CPU power connector from your power supply unit (PSU) to the corresponding ports on the motherboard.
4.6. Front Panel and Rear I/O Connections
Connect your PC case's front panel connectors (power button, reset button, USB ports, audio jacks) to the appropriate headers on the motherboard. Connect peripherals to the rear I/O panel.

Mufananidzo: Kuvhara view of the rear I/O panel of the ASRock X870 Taichi Creator Motherboard, showing various ports including USB, HDMI, Ethernet, and audio jacks.
5. Operating Instructions
5.1. Initial Boot uye BIOS / UEFI Setup
- Mushure mekuunganidza PC yako, batanidza chekutarisa, keyboard, uye mbeva.
- Power on your system. During startup, repeatedly press the Del or F2 kiyi yekupinda iyo BIOS/UEFI setup utility.
- Gadzirisa kurongeka kweboot, vhura XMP/EXPO yekurangarira, uye gadzirisa mamwe marongero sezvinodiwa.
- Save changes and exit the BIOS/UEFI. The system will restart.
5.2. Kuiswa kwemutyairi
After installing your operating system, install the necessary drivers for the motherboard components. These can typically be found on the ASRock support website or the included driver CD/USB drive.
- Chipset Drivers
- LAN Drivers (10Gbps, 5Gbps)
- Wi-Fi 7 + Bluetooth Drivers
- Vatyairi veAudio (Realtek ALC4082)
- Vatyairi ve USB
6. Kuchengeta
6.1. Kuchenesa
Regularly clean your PC to prevent dust buildup, which can lead to overheating. Use compressed air to remove dust from fans, heatsinks, and other components. Ensure the system is powered off and unplugged before cleaning.
6.2. BIOS Updates
Periodically check the ASRock website for BIOS/UEFI updates. Updates can improve system stability, add support for new CPUs, or fix bugs. Follow the instructions provided by ASRock carefully when performing a BIOS update.
7. Kugadzirisa matambudziko
Kana ukasangana nematambudziko, tarisa kune anotevera akajairika matanho ekugadzirisa dambudziko:
- Hapana Simba: Ensure all power cables (24-pin ATX, 8-pin CPU) are securely connected. Check your PSU and wall outlet.
- Hapana Chiratidziro: Verify that your monitor is connected to the correct graphics output (dedicated GPU or integrated graphics). Reseat your graphics card and RAM modules.
- Kusagadzikana kweSystem: Check CPU and GPU temperatures. Ensure RAM is properly seated and configured (XMP/EXPO settings). Update drivers and BIOS.
- Kudzokorora kweBIOS: The motherboard features a BIOS Flashback button on the rear I/O panel. This allows you to update the BIOS without a CPU or RAM installed. Refer to the ASRock websaiti kuti uwane mirayiridzo yakadzama yekushandisa chinhu ichi.
- Bvisa CMOS: If your system fails to boot after changing BIOS settings, you can clear the CMOS to reset BIOS settings to default. Locate the 'CLR CMOS' button or jumper on the motherboard (often near the rear I/O).
8. Zvinotsanangurwa
| Feature | Tsanangudzo |
|---|---|
| Brand | ASRock |
| Model Name | X870 |
| Item Model Number | 90-MXBTE0-A0UAYZ |
| CPU Socket | Socket AM5 |
| Inowirirana processors | AMD Ryzen 9000, AMD Ryzen 8000, AMD Ryzen 7000 Series |
| Chipset Type | AMD X870 |
| RAM Memory Technology | DDR5 |
| Ndangariro Slots | 4 x DDR5 DIMM Slots (Dual Channel, up to 8000+(OC), 256GB max) |
| Graphics Output | 2 x USB4 Type-C (up to 8K 30Hz), 1 x HDMI 2.1 (up to 4K 120Hz) |
| PCIe Slots | 2 x PCIe 5.0 x16 (x8/x8), 1 x PCIe 3.0 x16 |
| Storage | 4 x SATA3, 1 x Ultra M.2 (PCIe Gen3x4), 1 x Hyper M.2 (PCIe Gen4x4), 2 x Blazing M.2 (PCIe Gen5x4) |
| LAN | 10Gbps LAN, 5Gbps LAN |
| Wireless LAN | 802.11be Wi-Fi 7 + Bluetooth |
| Vadivelu Comedy Audio | Realtek ALC4082 7.1 CH HD Audio Codec, Nahimic Audio |
| USB Ports (Kumashure) | 2 x USB 2.0, 6 x USB 3.2 Gen1, 2 x USB 3.2 Gen2, 2 x USB4 Type-C |
| USB Ports (Front) | 6 x USB 2.0, 4 x USB 3.2 Gen1, 1 x USB 3.2 Gen2x2 Type-C |
| Fomu Factor | ATX |
| Power Phase Design | 18+2+1 Power Phase, 80A SPS |
9. Ruzivo rweWaranti
ASRock motherboards typically come with a limited manufacturer's warranty. The duration and terms of the warranty may vary by region and retailer. Please retain your proof of purchase for warranty claims. For detailed warranty information, refer to the official ASRock websaiti kana kubata nzvimbo yako yekutenga.
10. Technical Support
For technical assistance, driver downloads, BIOS updates, and further product information, please visit the official ASRock support websaiti:
Rutsigiro rwepamutemo rweASRock
You may also contact ASRock customer service directly through their websaiti yerutsigiro rwemunhu oga.


